From Osi
Report views for analyzing data entered in iHRIS are created by the Administrator or Manager for other users to access (see The Customized Report Builder for more information). Several predefined report views are included when iHRIS is installed.
To access the reports, click View Reports in the main menu or left navigation menu. All of the saved report views are displayed.
Reports are organized by category depending on the type of data displayed. Pre-defined categories include Training Reports, Training Institutions, Person Reports, and Search Reports. | 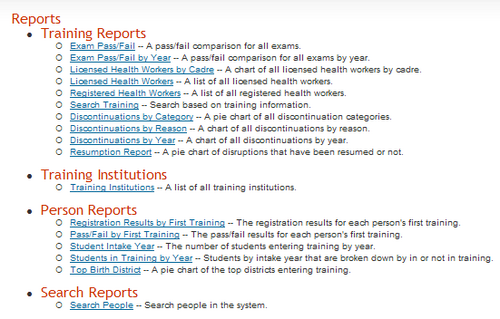
|
| To run a report, click its name. Reports will display according to the set default view - either as a table, pie chart, or bar chart. For table display, change the sort order by clicking any column name. In most table reports, you can also click an employee's name, a position title or code, or a facility name to display the full record for that person, position or facility. | 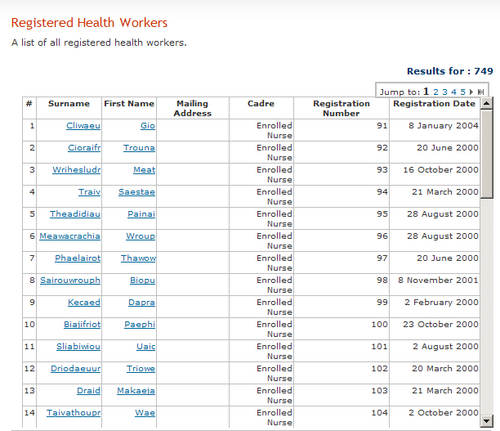
|
Filtering Reports
Under "Choose options to limit results," there are filtering options to limit the data analyzed. The filters differ depending on the type of report selected. For example, some reports can be filtered by gender, so that only results for male or female health workers will be shown. Others can be filtered by cadre, geographical location, or facility, to limit the analyzed data to a particular location. If no filters are selected, then the report will include all data entered in the system. Once you have selected filters and other settings for the report, click the View button to display the report with your selected changes. | 
|
Charting Reports
Table reports can be converted to charts, and charts can be displayed differently. First, select the charting options by clicking Options under the Chart button. You can graph the data in pie chart, bar chart, column chart or scatter plot form. You must also select whether to chart one or two fields and which fields to display in the chart. Once the charting options are set, click the Chart button to display the report as a chart with the selected options. Move the mouse over the chart to display aggregated totals. Print a chart by clicking the Print option in the upper right corner. | 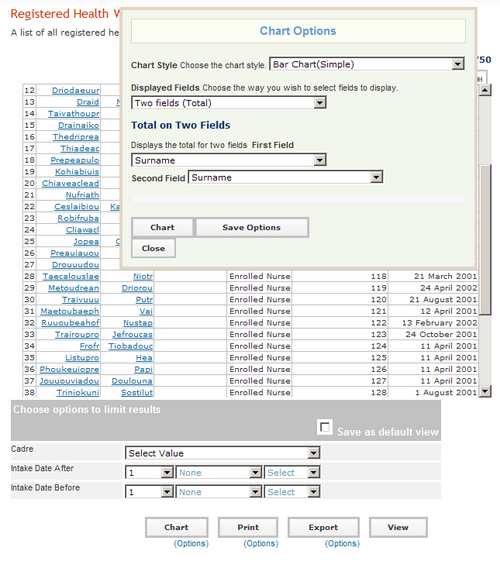
|
Exporting and Printing Reports
Click the Export button to export the report data for use in Excel spreadsheets and other systems. The default is to export the data as a comma-separated values file suitable for importing into Excel. To export in tab-delimited or HTML format, click Options under the Export button.
Once you click Export, you will be prompted to save the file to a location on your computer. To import the data into a spreadsheet, open Excel and choose Get External Data. You must then choose the type of file you exported--comma- or tab-delimited--for Excel to display the data correctly. | 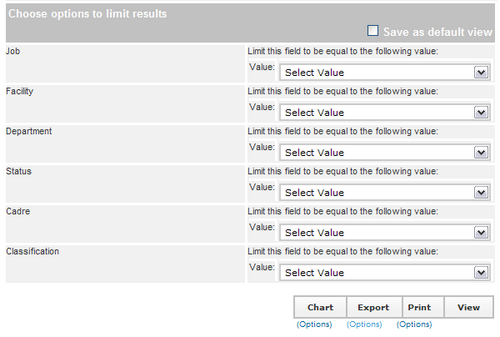
|
Finally, you can export the report as a formatted PDF file suitable for saving and printing by clicking the Print button. Click Options under the Print button to change the paper size and orientation. | 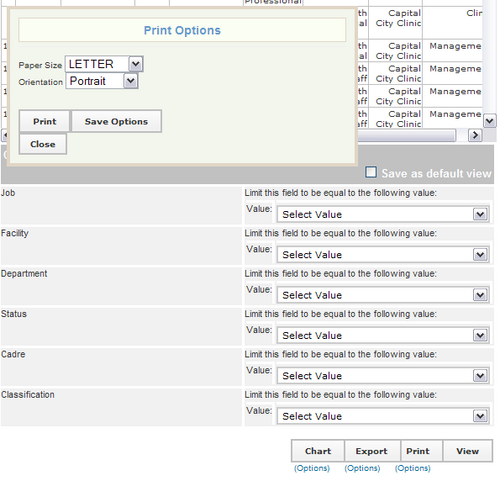
|


