Using Windows iHRIS
From Osi
A Windows version of the iHRIS Suite has been developed for use in locations where there is no or limited Internet access or where no Linux server is available. It installs a single-user instance of all three components of the iHRIS Suite on the Windows desktop: iHRIS Manage, iHRIS Qualify and iHRIS Plan. Please note that iHRIS WINDOWS IS BASED ON AN OLDER, OUT OF DATE VERSION OF iHRIS.
Choose the Windows version for installation in decentralized locations, such as a hospital, health facility or local government office, where network connectivity and technical support may not be as reliable, understanding that there are greater security and data quality risks associated with the Windows version. In that situation, it is recommended that iHRIS be installed on a Windows computer that is physically secure from unauthorized access, that is not used for any purpose other than running iHRIS and that access to iHRIS be limited to as few users as practicable.
Windows iHRIS may also be installed with sample data as a demonstration of the program before installing the full server-based version. Advanced users may export data from Windows iHRIS for import into a server-based version of iHRIS using the PHP MyAdmin tool included with Windows iHRIS.
Contents |
Install Windows iHRIS
You must download Windows iHRIS as a separate installer. Go to the Software Downloads page (http://www.capacityplus.org/hris/suite/ihris_software.php) on the HRIS Strengthening website to download the software.
Windows iHRIS requires Windows XP, 500MB hard disk space and 1GB RAM. A web browser is required to run the software. Firefox 2+ or Internet Explorer 7+ is highly recommended.
Follow these steps to install the software:
| Download the executable file (latest version) from Launchpad to a Windows XP computer. Quit all running programs. Run the executable. The installation wizard will start. Click Next when prompted. | 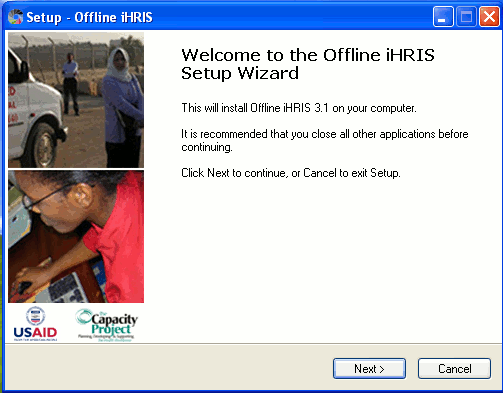
|
| When prompted, read and accept the license agreement, and click Next. | 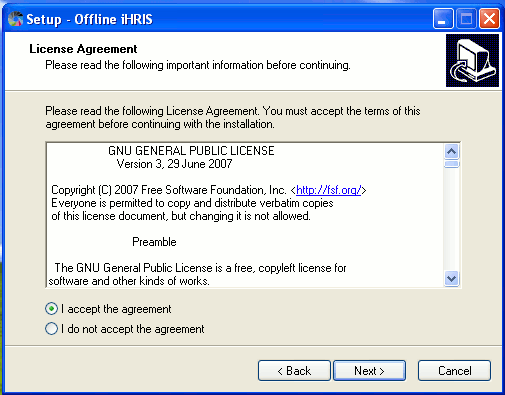
|
| Choose the directory where to install the program. The default directory is recommended for fastest loading times. Click Next. | 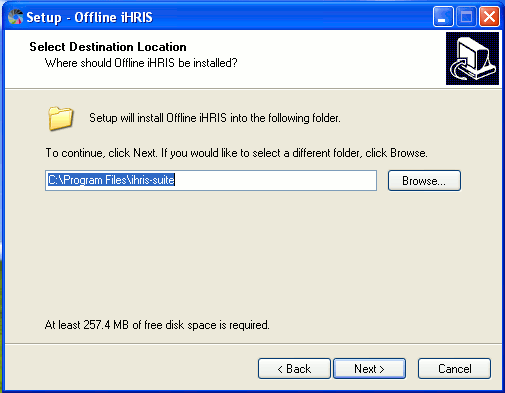
|
| Select which of the iHRIS components to install: iHRIS Qualify, iHRIS Manage and/or iHRIS Plan. Select whether to install PHP MyAdmin; this tool will help you manage the database and import or export data (advanced users). Click Next. | 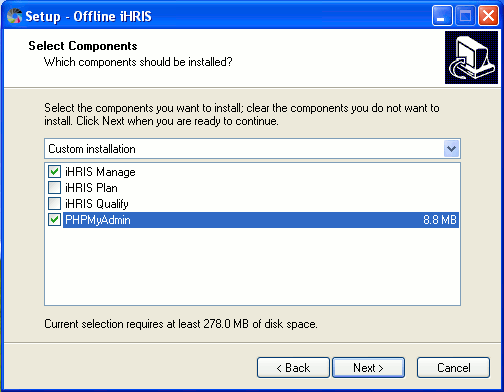
|
| Specify an SMTP server and email address to use with the software. If unsure, keep the defaults and click Next. | 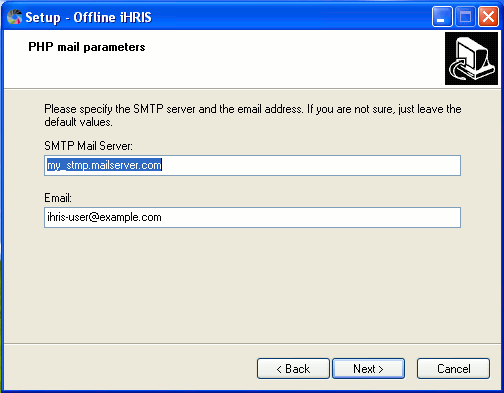
|
| For each component installed, select whether to limit access to the local computer only or make it available on a local area network. Enter the appropriate ports for the Apache and MySQL servers. If unsure, keep the defaults. Enter and re-enter a password for the MySQL database, and click Next. You cannot proceed with the installation without entering a database password. | 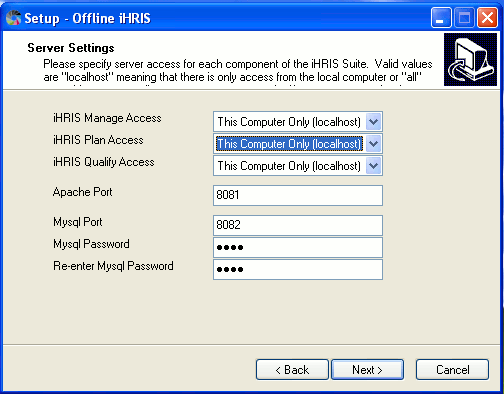
|
| Specify whether to automatically launch Windows iHRIS once the installation is completed (recommended). Select whether to create a Quick Launch and/or a Desktop icon for Windows iHRIS, and click Next. | 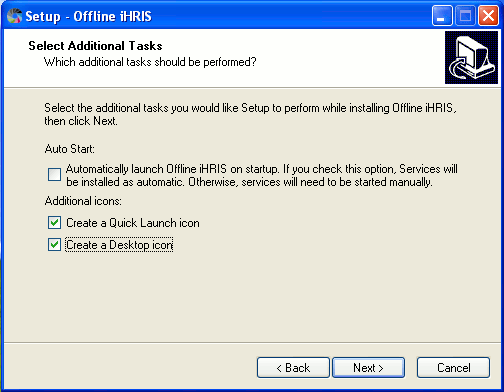
|
| Click Install and wait for Windows iHRIS to install. Click Finish when the installation is complete. | 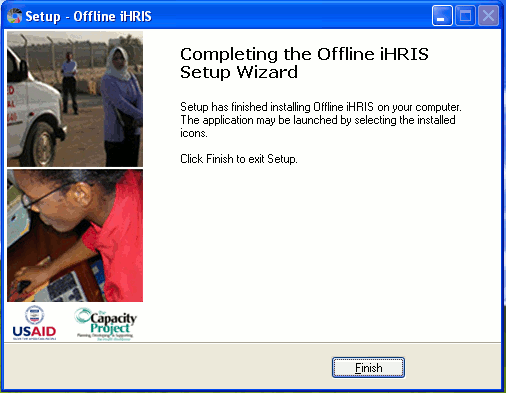
|
Note: If you have installed Windows Firewall, you will be prompted to unblock the firewall for Windows iHRIS at the end of installation. Select the option to unblock the firewall.
Set Up Windows iHRIS
If Windows iHRIS does not launch immediately following installation, launch it from Programs on the Start menu, or double-click the desktop icon. The iHRIS icon appears in the taskbar (lower right hand corner of your screen) when Windows iHRIS is running.
- The splash screen appears in your web browser with the components of the iHRIS suite that you installed. Click on a component to load it.
- The first time a component loads may take some seconds. Do not click Reload while the component is loading.
- You will be prompted to change your password. Click "Change Password" on any page to do this. (For more information, see the section Change Password.)
- You will be prompted to create a non-administrator user for everyday use. Click "Configure System", then "Administer Users" to do this. (For more information, see the section Add a User.)
- You will be prompted to load modules and sample data. The choices are:
- Training Management module (iHRIS Manage only): This module enables you to set up a training program and schedule training classes for employees.
- Base Data (iHRIS Manage and Qualify): Includes standard data lists such as marital status and countries; recommended for most users. Base data can be edited after loading.
- Medical Base Data (iHRIS Manage and Qualify): Includes standard data lists for public health such as cadres and facilities; recommended for public health (such as Ministry of Health) users. Medical base data can be edited after loading.
- Sample Data (all components): A fictional dataset intended for demonstration purposes only. Not recommended for users who intend to enter their own data in the system.
If you intend to use Windows iHRIS to enter and manage data, we recommend unchecking all sample data.
Note that enabling modules and sample data takes a few seconds. The system displays a message when the modules and data have been loaded.
Using Windows iHRIS
| While Windows iHRIS is running, the iHRIS icon appears in the taskbar in the lower right corner of your screen. | 
|
| To switch between any of the components or return to the main screen, left-click this icon. | 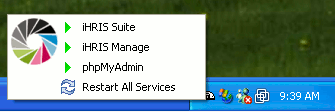
|
| You can also launch PHP MyAdmin, a tool for directly managing your databases and exporting or importing data (advanced users only). For help with using PHP MyAdmin, see the PHP MyAdmin website (http://www.phpmyadmin.net/home_page/index.php). To quit Windows iHRIS, right-click the taskbar icon and select Exit. | 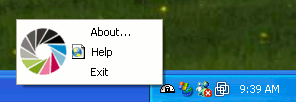
|